-
E-mail
481354564@qq.com
-
Phone
15067768834
-
Address
2nd Floor, Building 2, No. 29 Yangliu Road, Longwan District, Wenzhou City, Zhejiang Province
Wenzhou Lifei Fluid Equipment Co., Ltd
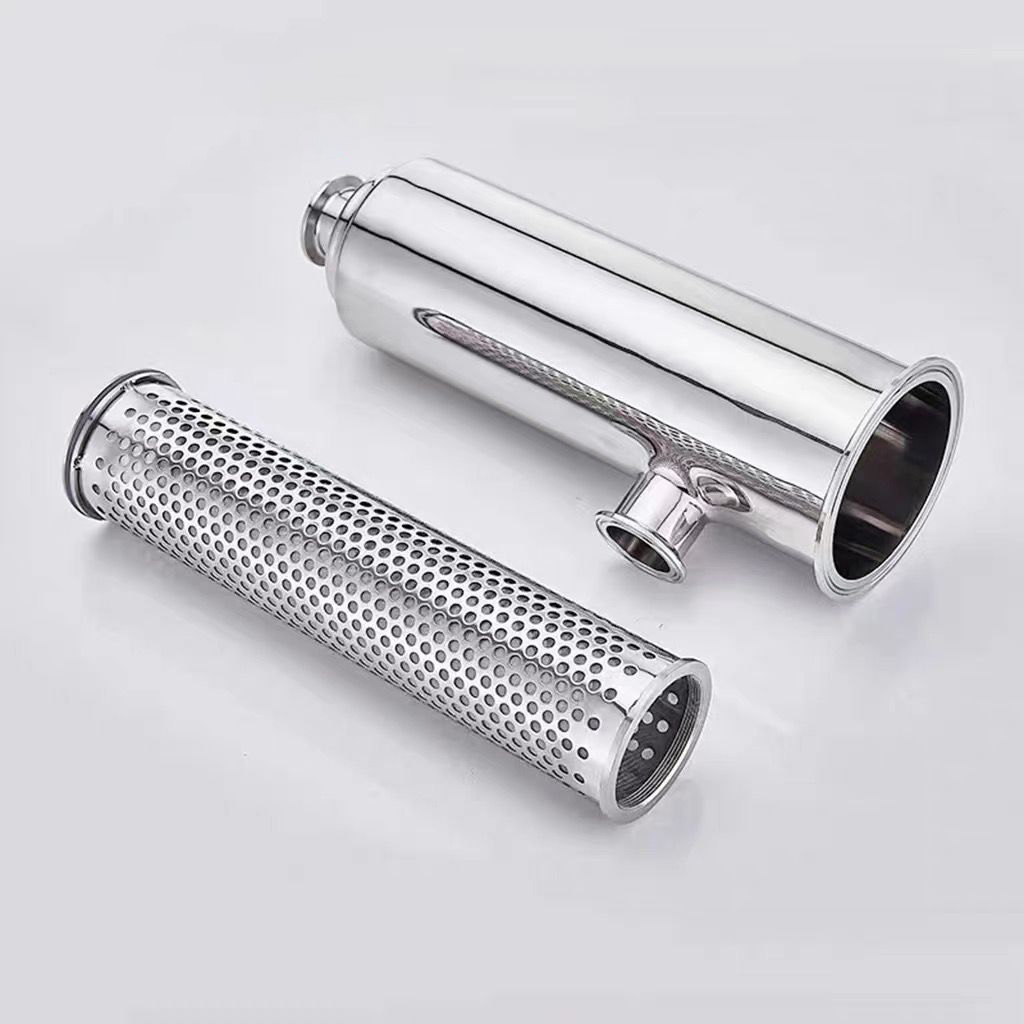
Quick installation angle filter installation
Date: 2025-12-25Read: 31
Quick installation angle filter is a type of angle filter equipment with quick disassembly and assembly function, widely used in sanitary fluid pipeline systems. Its installation needs to follow the core process of "inspection preparation positioning installation sealing debugging cleaning inspection". The specific operating steps and precautions are as follows:
1、 Preparation before installation
1. Equipment inspection: After opening the box, check whether the quick installation angle filter body, filter basket/filter element, quick installation clamp, sealing gasket and other accessories are complete, and whether there are any bumps, deformations or damages on the appearance; Focus on checking whether the sealing gasket is intact without aging or cracks, whether the filter basket/filter element is clean and unobstructed, and ensure that all components meet installation requirements.
2. Pipeline matching: Confirm that the diameter and interface type of the installed pipeline match the quick installation interface of the filter (commonly a sanitary quick installation chuck interface), and check whether the space of the pipeline installation position meets the installation and subsequent maintenance needs of the filter. Angle installation should ensure that the inlet and outlet directions are consistent with the pipeline flow direction (usually marked with "IN" and "OUT" signs).
3. Media adaptation: Verify the temperature, pressure, corrosiveness, and other parameters of the medium to be filtered, ensuring that it matches the material of the filter (commonly 304/316L stainless steel) and the applicable range of the filter material, to avoid equipment damage caused by incompatible media.
2、 Positioning and installation
1. Installation direction: Determine the installation position of the filter according to the pipeline direction and filtration requirements. Angle filters are usually installed at the corners of the pipeline and must be installed strictly according to the flow direction markings on the housing to ensure that the medium enters from the "IN" port and flows out from the "OUT" port. Reverse installation is not allowed, otherwise it will affect the filtration effect and may damage the equipment.
2. Interface connection: First, align the quick release chucks at both ends of the pipeline with the quick release chucks at the inlet and outlet of the filter. Place a suitable sanitary grade sealing gasket at the interface (ensure that the gasket is centered and not offset), then put on the quick release clamp, evenly tighten the clamp bolts, and make the interface sealing surface tightly fit to avoid leakage gaps.
3. Fixed reinforcement: If the installation location is at a high altitude or in a pipeline with high vibration, the filter needs to be fixed and supported by a bracket to prevent the interface from loosening or the pipeline from deforming due to vibration or gravity. The bracket installation should ensure that the filter is evenly stressed and does not affect subsequent disassembly and maintenance.
3、 Sealing debugging
1. Leakage test: After installation, close the outlet valve of the filter and slowly introduce clean water or the medium to be filtered (pressure controlled within 50% of the rated pressure of the equipment). Observe whether there is leakage at the inlet and outlet interfaces, clamp connections, shell welds, and other parts of the filter. If leakage is found, immediately stop the machine and release the pressure. Check whether the sealing gasket is installed properly or damaged, adjust and re tighten.
2. Exhaust operation: Open the exhaust valve at the top of the filter (if any) to exhaust the air in the equipment and pipelines, avoiding air residue that may cause unstable filtration pressure or affect the filtration effect. After the exhaust is completed, close the exhaust valve.
3. Pressure debugging: Gradually open the outlet valve, adjust the pipeline flow, observe the values of the filter inlet and outlet pressure gauges (if any), and ensure that the working pressure is within the specified range of the equipment and there are no abnormal fluctuations.
4、 Cleaning and inspection after installation
1. External cleaning: Wipe the filter housing and connecting pipelines with a clean cloth to remove impurities such as oil and dust generated during installation, ensuring that the equipment is clean and meets hygiene requirements.
2. Operation inspection: Start the pipeline system and let the filter run normally for a period of time. Check again whether there is any leakage in the connection parts and whether the filtration effect meets expectations (such as observing the clarity of the outlet medium). If there is any abnormality, stop the machine in time for handling.
5、 Installation precautions
1. During the installation process, avoid collision and scratching of the sealing surface and mirror polished parts of the filter to prevent affecting the sealing performance and hygiene level.
2. The bolts of the quick installation clamp should be tightened evenly, without excessive force, to avoid damaging the chuck or sealing gasket; When disassembling, first release the pressure and then loosen the clamp.
3. The installation position of the filter should be convenient for subsequent maintenance, with sufficient space reserved for disassembly and assembly, making it easy to regularly replace the filter basket/filter element and clean the equipment.
If used in scenarios with high hygiene requirements such as food and pharmaceuticals, the filters and pipelines need to be sterilized before installation to ensure compliance with industry hygiene standards.


Last Article: Working principle of quick installation butterfly valve
Next Article: Working principle of air blocker