-
E-mail
773627655@qq.com
-
Phone
18758133166
-
Address
2nd Floor, Building 7, No. 63 Jiuhuan Road, Jianggan District, Hangzhou City, Zhejiang Province
Product Categories
Hangzhou Luheng Biotechnology Co., Ltd
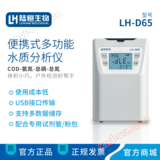
Luheng Bio Portable COD Ammonia Nitrogen Total Phosphorus Total Nitrogen Detector LH-D65
NegotiableUpdate on 02/11
- Model
- Nature of the Manufacturer
- Producers
- Product Category
- Place of Origin
Overview
Rapid detection of sewage indicators
Product Details
Luheng Biological COD Ammonia Nitrogen Total Phosphorus Total Nitrogen Rapid Detection Instrument LH-D65
model |
Testing items |
LH-C1 |
COD |
LH-C2 |
COD、 Ammonia nitrogen |
LH-C3 |
COD、 Ammonia nitrogen, total phosphorus |
LH-D65 |
COD、 Ammonia nitrogen, total phosphorus, total nitrogen |
LH-NP2 |
Ammonia nitrogen, total phosphorus |
LH-P35 |
Total phosphorus |
LH-D62 |
Total nitrogen |
COD determination
Measurement steps:
1. Estimate the COD value of the water sample and select an appropriate range.
2. Select reagents according to the corresponding range and add them to the water sample:
When the COD value of the water sample is 0-150mg/L (c11):
① Use a pipette to absorb 2ml of purified water and add it to an LR reagent tube (for zero adjustment).
② Use a pipette to draw 2ml of the water sample to be tested and add it to another LR reagent tube.
When the COD value of the water sample is 100-1500mg/L (c12):
① Use a pipette to absorb 2ml of purified water and add it to an HR reagent tube (for zero adjustment).
② Use a pipette to draw 2ml of water sample and add it to another HR reagent tube.
COD determination
When the COD value of the water sample is 1000-15000mg/L (c13):
① Use a pipette to absorb 2ml of purified water and add it to an HR reagent tube (for zero adjustment).
② First, use a pipette to draw 1.8ml of purified water and add it to another HR reagent tube, then add 0.2ml of water sample.
Note: c12 and c13 can share one zeroing reagent tube.
(Danger: The reagent tube contains concentrated sulfuric acid. Please wear gloves during operation. If it accidentally comes into contact with the skin, please rinse immediately with plenty of water.)
3. Tighten the lid of the reagent tube, invert it up and down, and shake well. Place the reagent tube into the digestion apparatus and digest at 165 ℃ for 20 minutes.
(Warning: When adding water sample, the temperature inside the reagent tube rises sharply. When operating, hold the lid in your hand to avoid burns.)
4. After digestion is complete, remove the reagent tube and place it on the test tube rack
6. Press the "on/off" button to turn on the device, and the screen will display "idLE" in the middle, indicating that the device has been turned on. Press the "switch" button to select the desired testing item.
7. Open the detection chamber cover, ensure that the surface of the zeroing water sample reagent tube is clean, place it in the detection chamber, cover the chamber cover, press the "zeroing" button, and when the screen displays "0" in the middle, it indicates that the zeroing is complete.
8. Open the compartment cover, take out the zeroing reagent tube, put in the water sample reagent tube to be tested, ensure that the surface of the reagent tube is clean, and cover the compartment cover.
9. Press the 'Read' button, and the number displayed in the middle of the screen represents the detection value of the water sample. (Unit: mg/L)
10. After the test is completed, press the "switch" button briefly to turn off the instrument.
Under the detection items of 1000-15000mg/L, the display screen shows XXX mg/L, which represents a detection value of XXX mg/L.
be careful:
Cool down to around 80 ℃ (within hand tolerance) and shake the liquid in the reagent tube again.
5. Place the reagent tube on the test tube rack and continue to cool to room temperature. Do not shake the reagent tube at this time.
It is normal for precipitation to occur in the COD reagent tube.
Total phosphorus determination
Measurement steps:
1. Estimate the total phosphorus content of the water sample and select an appropriate range.
2. Add water samples and reagents according to the corresponding range:
When the total phosphorus content of the water sample is 0-2mg/L (L22):
① Use a pipette to absorb 5ml of purified water and add it into an empty reagent tube (for zeroing).
② Take 5ml of water sample with a pipette and add it to another empty reagent tube.
When the total phosphorus content of the water sample is 0-20mg/L (L23):
① Use a pipette to absorb 5ml of purified water and add it into an empty reagent tube (for zeroing).
② Use a pipette to transfer 0.5ml of water sample and 4.5ml of purified water into another empty reagent tube.
3. Add one packet of reagent 1 to each reagent tube, tighten the lid of the reagent tube, and shake vigorously up and down for about 5 seconds (incomplete dissolution of the reagent does not affect the detection).
4. Place the reagent tube into the digestion apparatus and digest at 150 ℃ for 15 minutes. After digestion is complete, remove the reagent tube and place it on a test tube rack to cool to around 80 ℃ (which can be supported by hands), then shake the liquid in the reagent tube again.
5. After the reagent tube cools down to room temperature, turn on the water quality detector, press the "on/off" button to turn it on, and press the "switch" button to select the desired detection item.
6. Open the cap of the zeroing reagent tube, add 1 packet of reagent 2, shake to dissolve completely, then add 7 drops of activator P, tighten the cap of the reagent tube, shake for 5 seconds, place it in the detector, press the "zeroing" button, the instrument will start a 1-minute countdown, and automatically zero when the countdown ends.
be careful:
The total phosphorus measurement must be completed within 10 minutes after adding the activator.
L22 and L23 can share a zeroing reagent tube, which can be reused within 10 minutes.
Ammonia nitrogen determination
Measurement steps:
1. Estimate the ammonia nitrogen content in the water sample and select an appropriate range.
2. Press the "on/off" button to turn on the device, and the screen will display "idLE" to indicate that the power on is complete. Press the "Switch" button to switch and select the desired detection item.
3. Take 10ml (at the mark) of purified water and inject it into the colorimetric bottle. Cover it with a lid, wipe off any water stains or fingerprints on the surface of the colorimetric bottle, place it in the testing chamber, and cover it with the lid.
4. Press the 'Zero' button to reset, and when the screen displays' 0.00 ', it indicates that the reset is complete.
5. Add water samples and reagents according to the corresponding range:
When the ammonia nitrogen content in the water sample is 0-5mg/L (A55):
① Pour out the purified water from the colorimetric bottle and take a small amount of the water sample to be tested to rinse the colorimetric bottle. Pour out the rinsing liquid and take 10ml (at the mark) of the water sample to be tested into a colorimetric bottle.
When the ammonia nitrogen content in the water sample is 0-50mg/L (A56):
① Pour out the purified water from the colorimetric bottle, shake dry as much as possible, and take 1ml of water sample and 9ml of purified water into the colorimetric bottle.
6. Add 6 drops of activator A1 to the colorimetric bottle, shake well, and then add 6 drops of activator B2, shake well. Clean the colorimetric bottle and place it in the testing chamber, then cover the chamber lid.
7. Press the 'Read' button to read, and the instrument will start a 3-minute countdown. After the countdown ends, the instrument will automatically take readings
The value displayed in the center of the screen is the measured concentration value (unit: mg/L)。
8. After the test is completed, press the "on/off" button to shut down and clean the colorimetric bottle.
be careful:
The optimal temperature for detecting ammonia nitrogen is 15-25 ℃.
After adding an activator during ammonia nitrogen determination, it should be tested immediately.
Total nitrogen determination
Reagent 1: Take one packet of reagent 1 (1) powder and dissolve it in 5ml of reagent 1 (2). After complete dissolution, it is reagent 1 (10 doses). If not completely dissolved, it can be dissolved in 25
~Dissolve in a water bath at 40 ℃ and store in a refrigerator at 2-8 ℃ for one week before use.
Danger: The supporting reagents are all corrosive. Please wear gloves when operating. If they accidentally come into contact with the skin, please rinse immediately with plenty of water.
Measurement steps:
1. Turn on the power of the digestion instrument, set the temperature to 125 ℃, set the time to 30 minutes, and preheat.
2. Prepare three empty test tubes labeled A/B/C.
3. Add 1mL of water sample to test tube A, then add 0.5mL of total nitrogen reagent 1, cover with a lid, invert and mix 5 times.
4. Insert test tube A into the digestion apparatus that has been heated to 125 ℃, cover it with a lid, and heat it for digestion for 30 minutes
5. After digestion is complete, immediately remove test tube A and place it in
Cool in water at 15-20 ℃ for 5 minutes (the cold water level should be higher than the liquid level in the test tube).
6. Take 0.25mL of digestion solution from cooled test tube A and add it to test tube C. Add 2 drops of reagent 2 to test tube C,
Then add 0.6ml of reagent 3, cover with a lid, shake left and right 10 times, and time for 5 minutes. Finally, add 5ml of reagent 4 using a pipette,
Cover and mix upside down for 5 times, then cool in a 15-30 ℃ water bath for 5 minutes.
7. Determination of blank value: Add 5mL to test tube B
Accompanying distilled water.
8. Turn on the detector, press the "on/off" button to turn it on, and the middle of the screen will display "idLE" to indicate that the power on is complete.
Wipe test tube B clean, place it in the detector, and cover it with a lid
Start pressing the zero adjustment button to zero, and the screen will display: 0.00 mg/L.
9. Open the compartment lid, take out test tube B, put in test tube C, cover the compartment lid and press the "Read" button. The number displayed in the middle of the screen represents the detection value of total nitrogen in the water sample (unit: mg/L)。
10. After the test is completed, press the "switch" button briefly to turn off the instrument.
be careful:
Reagent 1 (1) needs to be completely dissolved in Reagent 1 (2) and stored at 2-8 ℃ for one week before use.
Reagent 2 needs to be stored away from light and added along the center of the test tube to avoid sticking to the tube wall.
Reagent 4 needs to be slowly added to the test tube to prevent splashing.
Do not open the test tube cover after cooling reagent 4 and before measurement. All reagents need to be stored at low temperature (2-8 ℃) and away from light.
Similar Product Recommend


